
DIY Ornament Chandelier
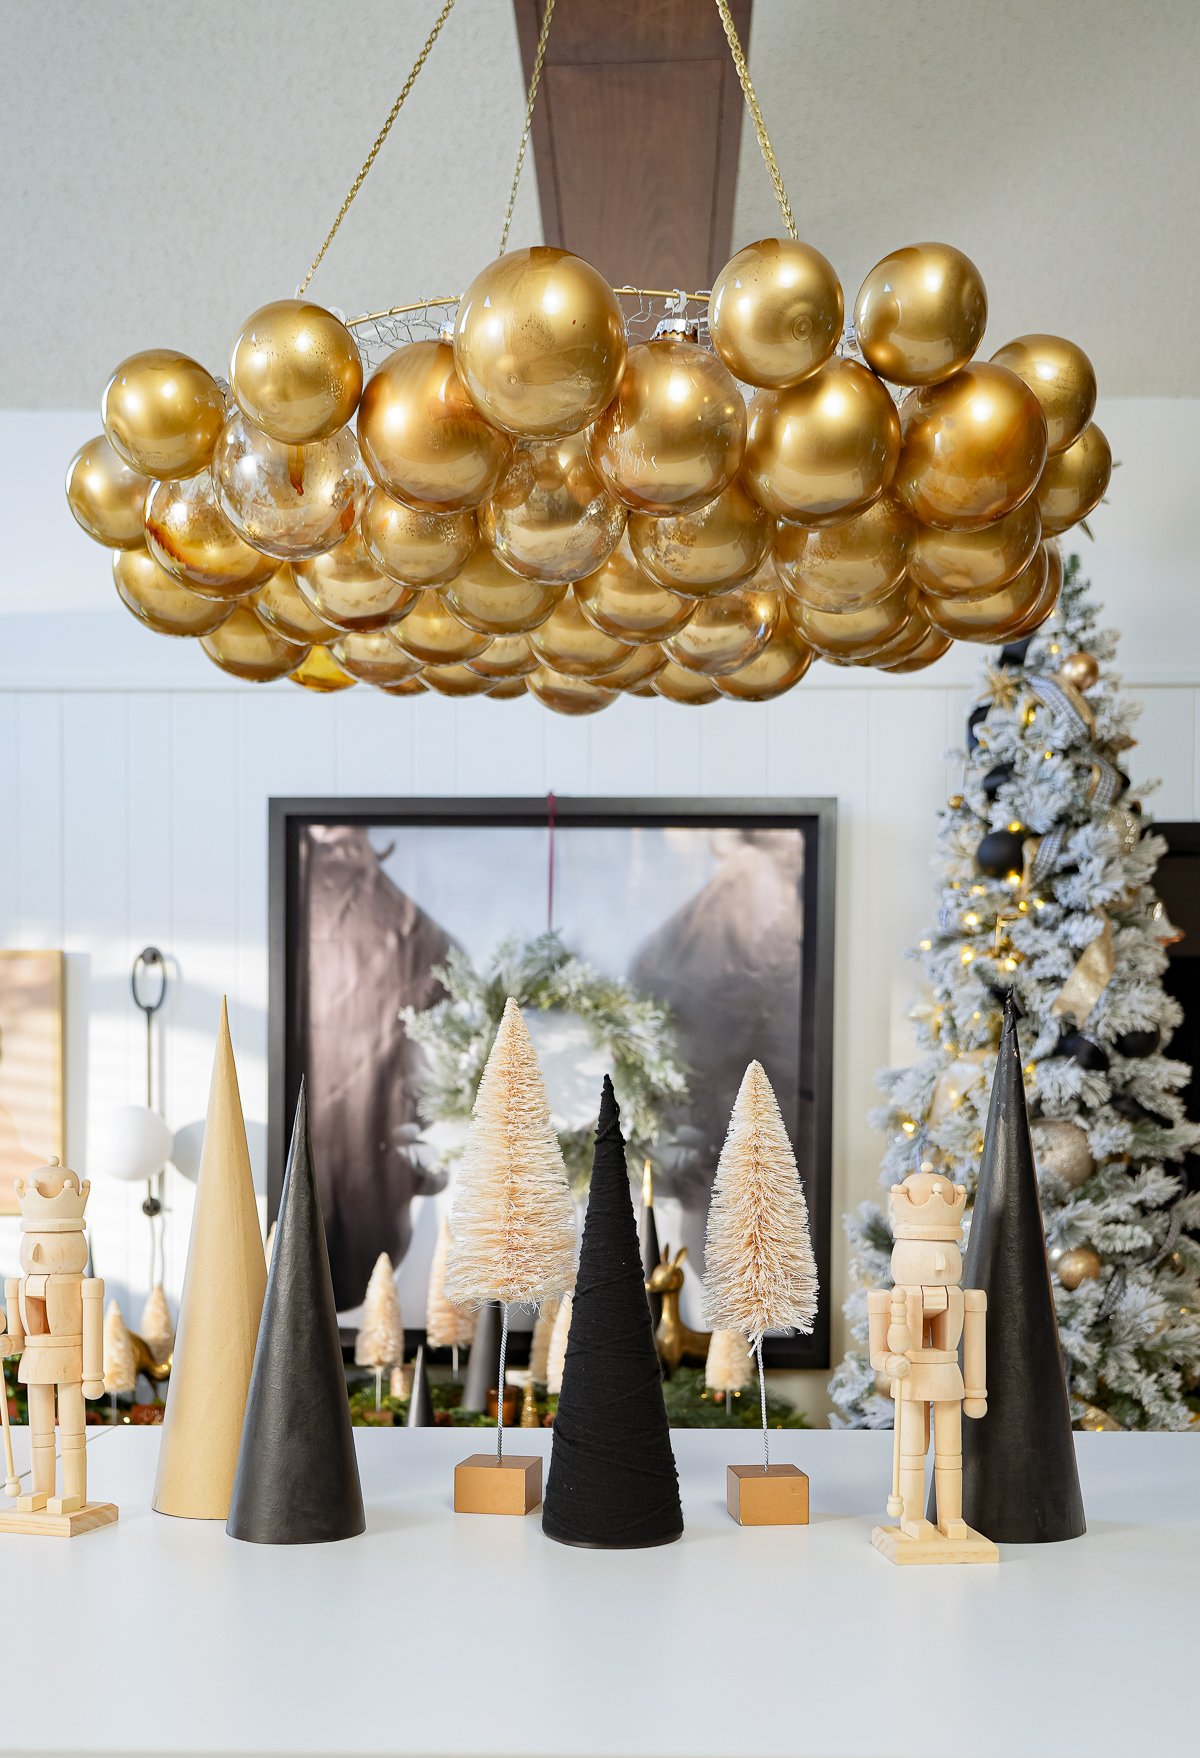
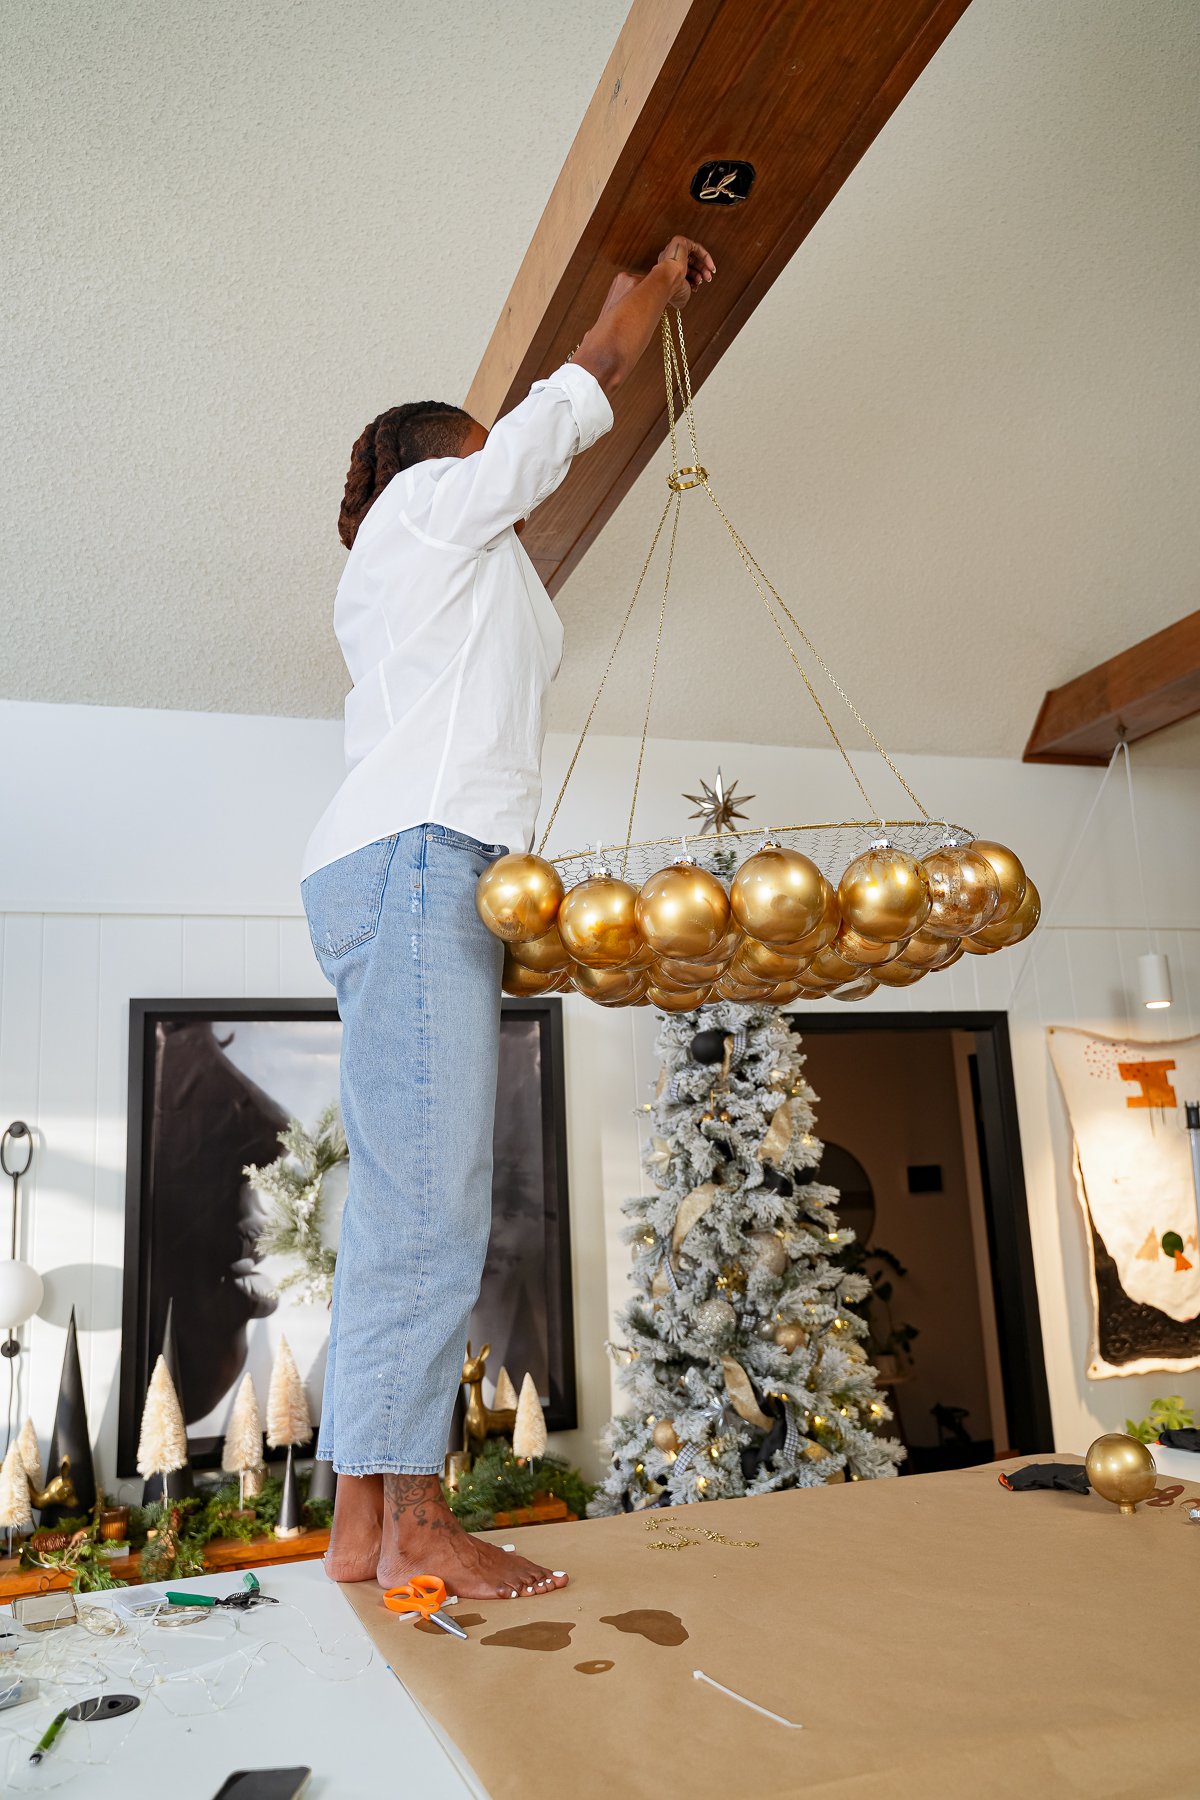
For the final episode of this season’s Crafts, Cocktails, and Conversation with Carmeon Hamilton, we decided to go all out and craft a project that was sure to be a showstopper. We created an Ornament Chandelier. While this holiday craft requires a little more elbow grease than the others, it’s a piece that could potentially be used all year-round.

Here’s What You Need:
6 inch ornaments (can also use varying sizes to create dimension)
Alcohol ink
Spray paint
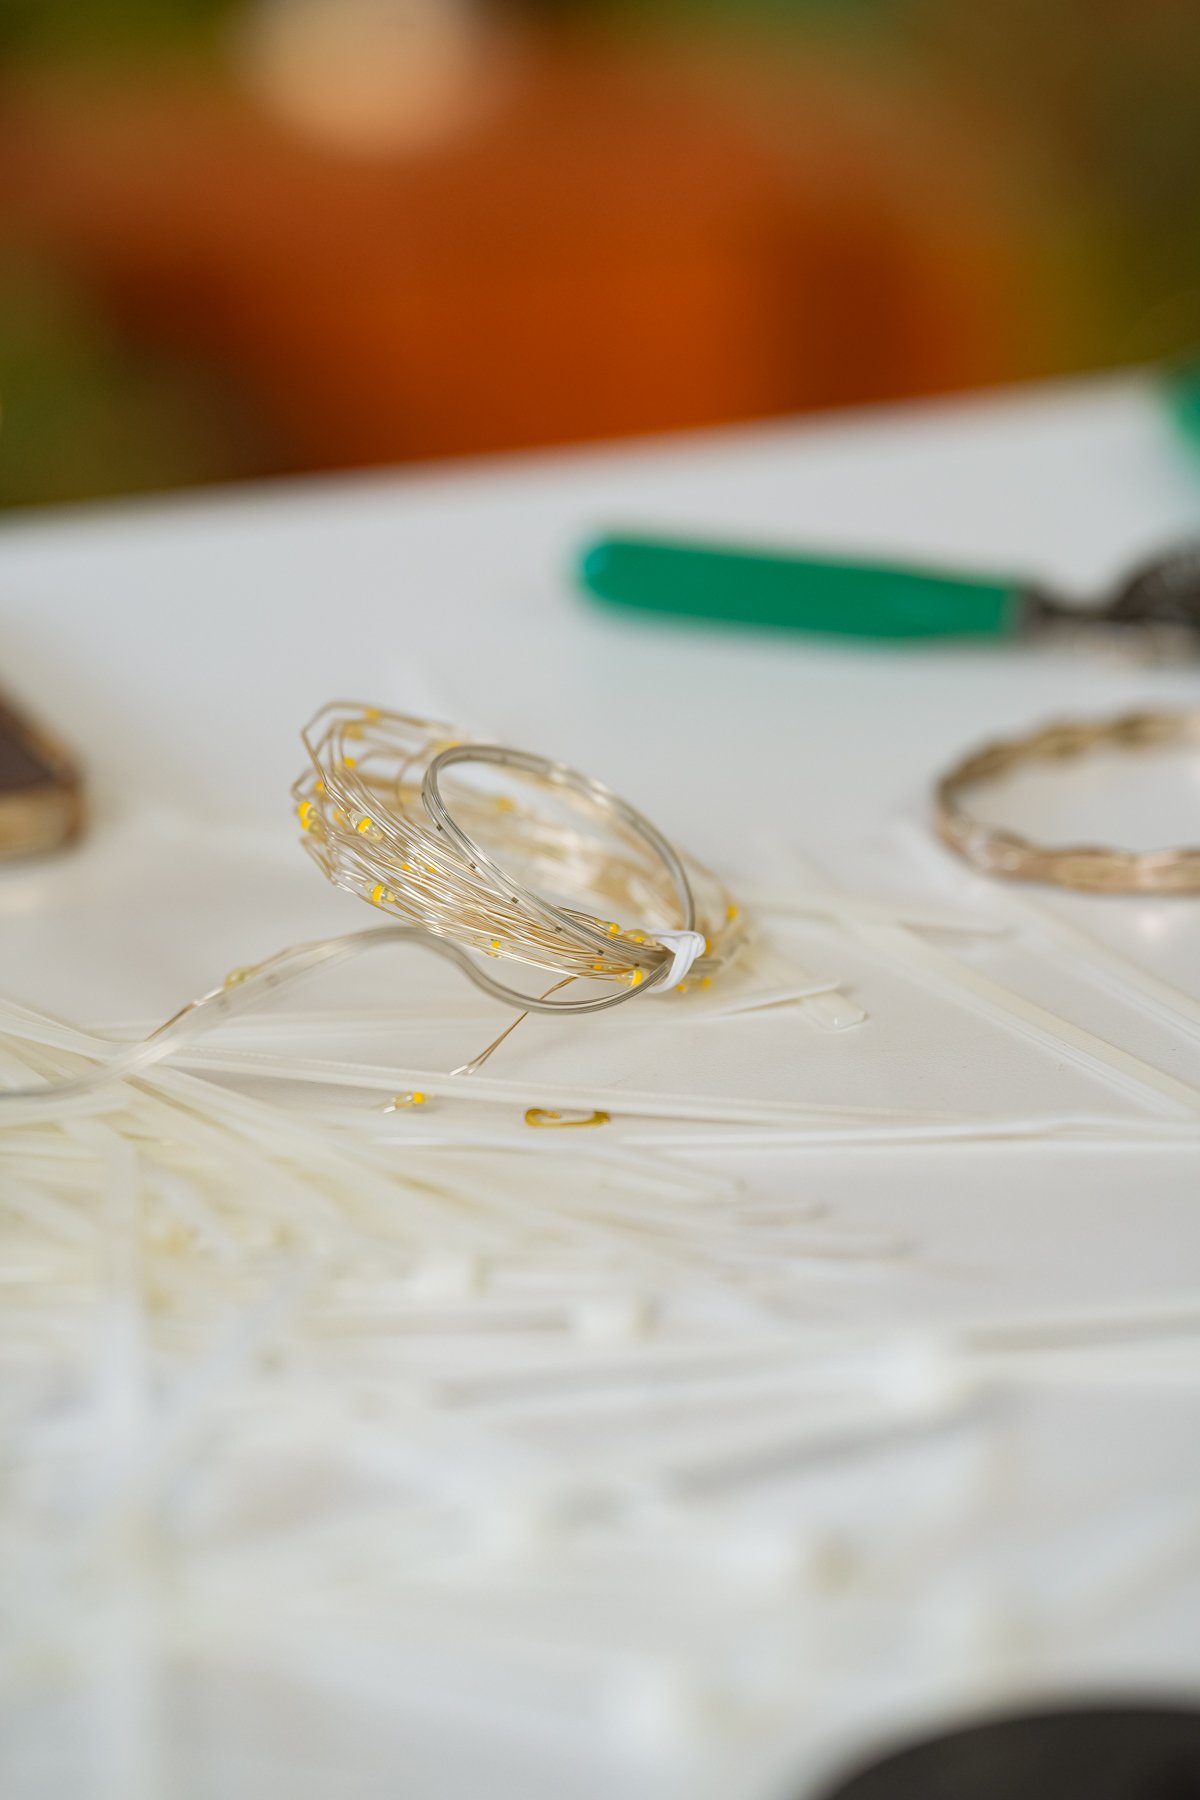
Remote-operated twinkle lights
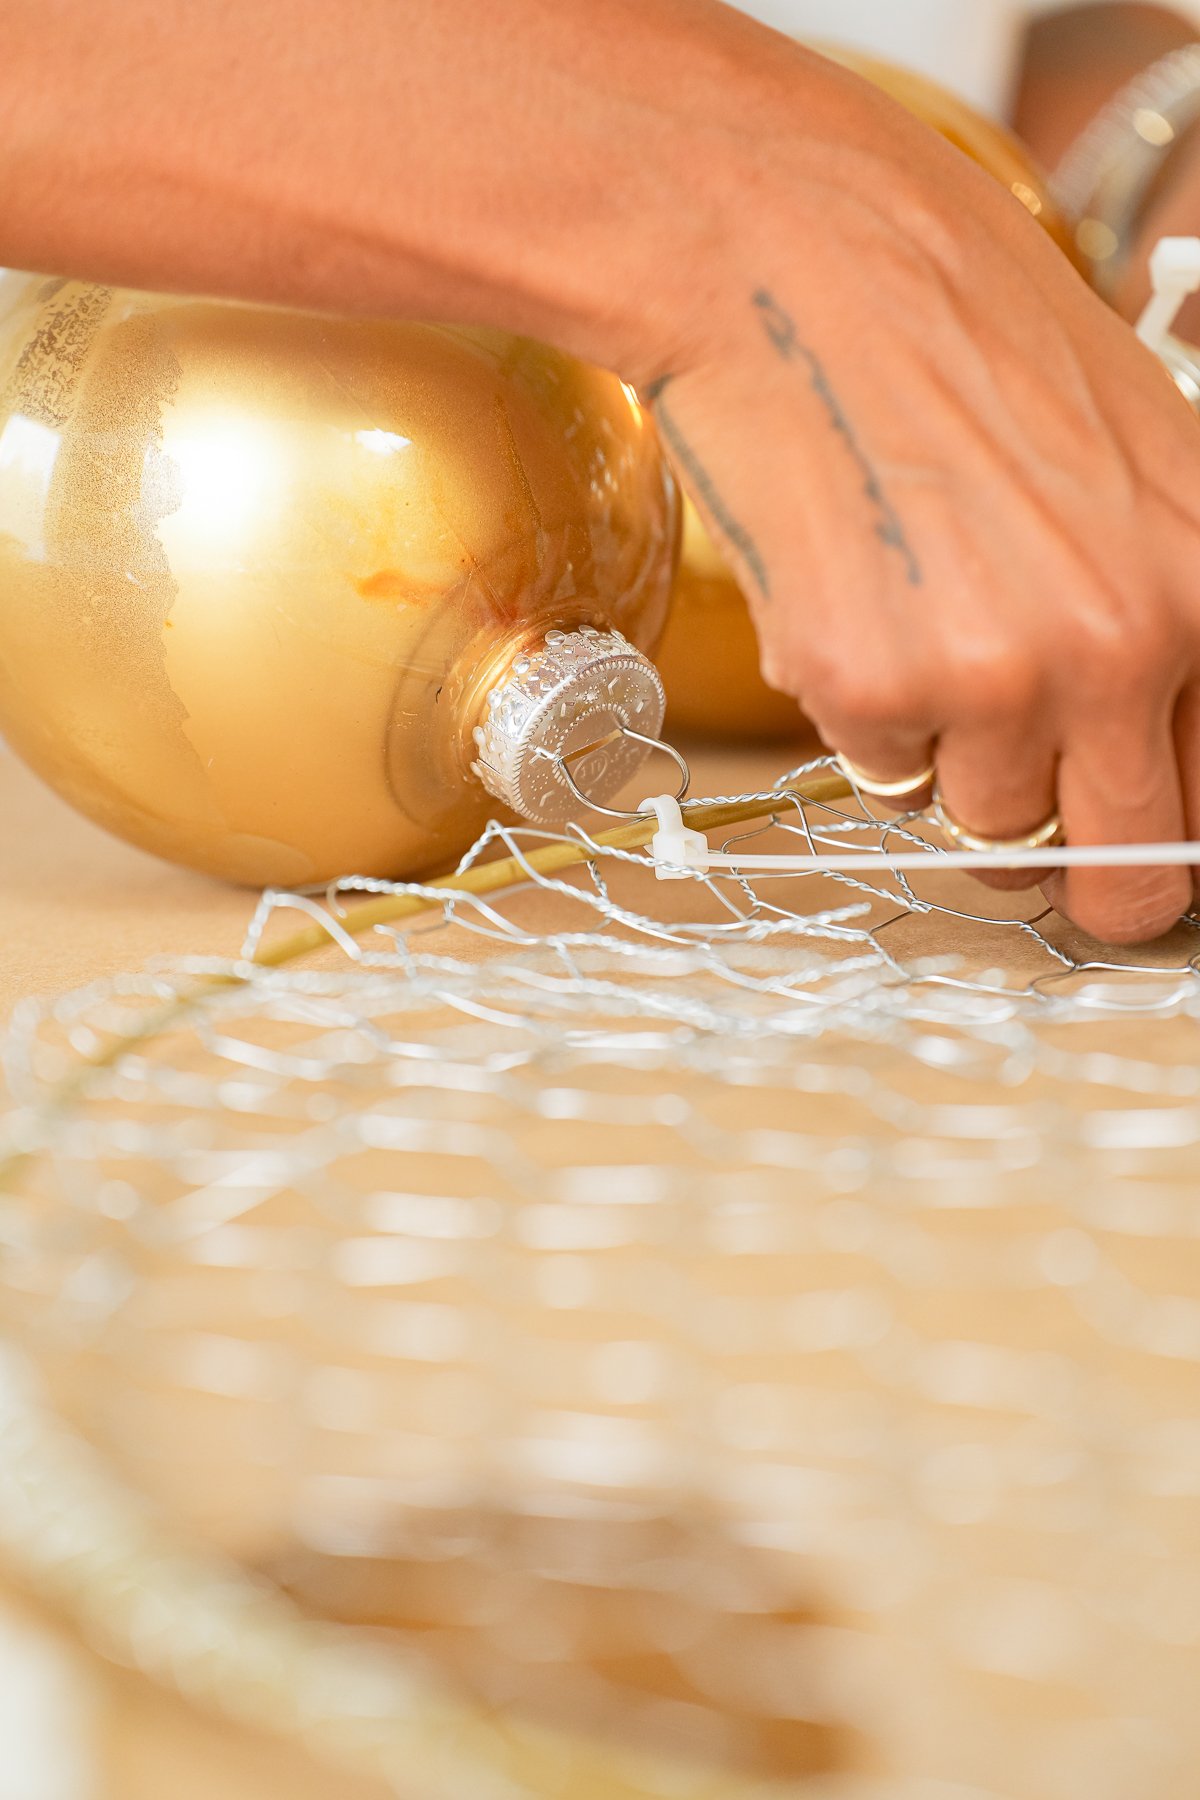
Zip ties
Chicken wire
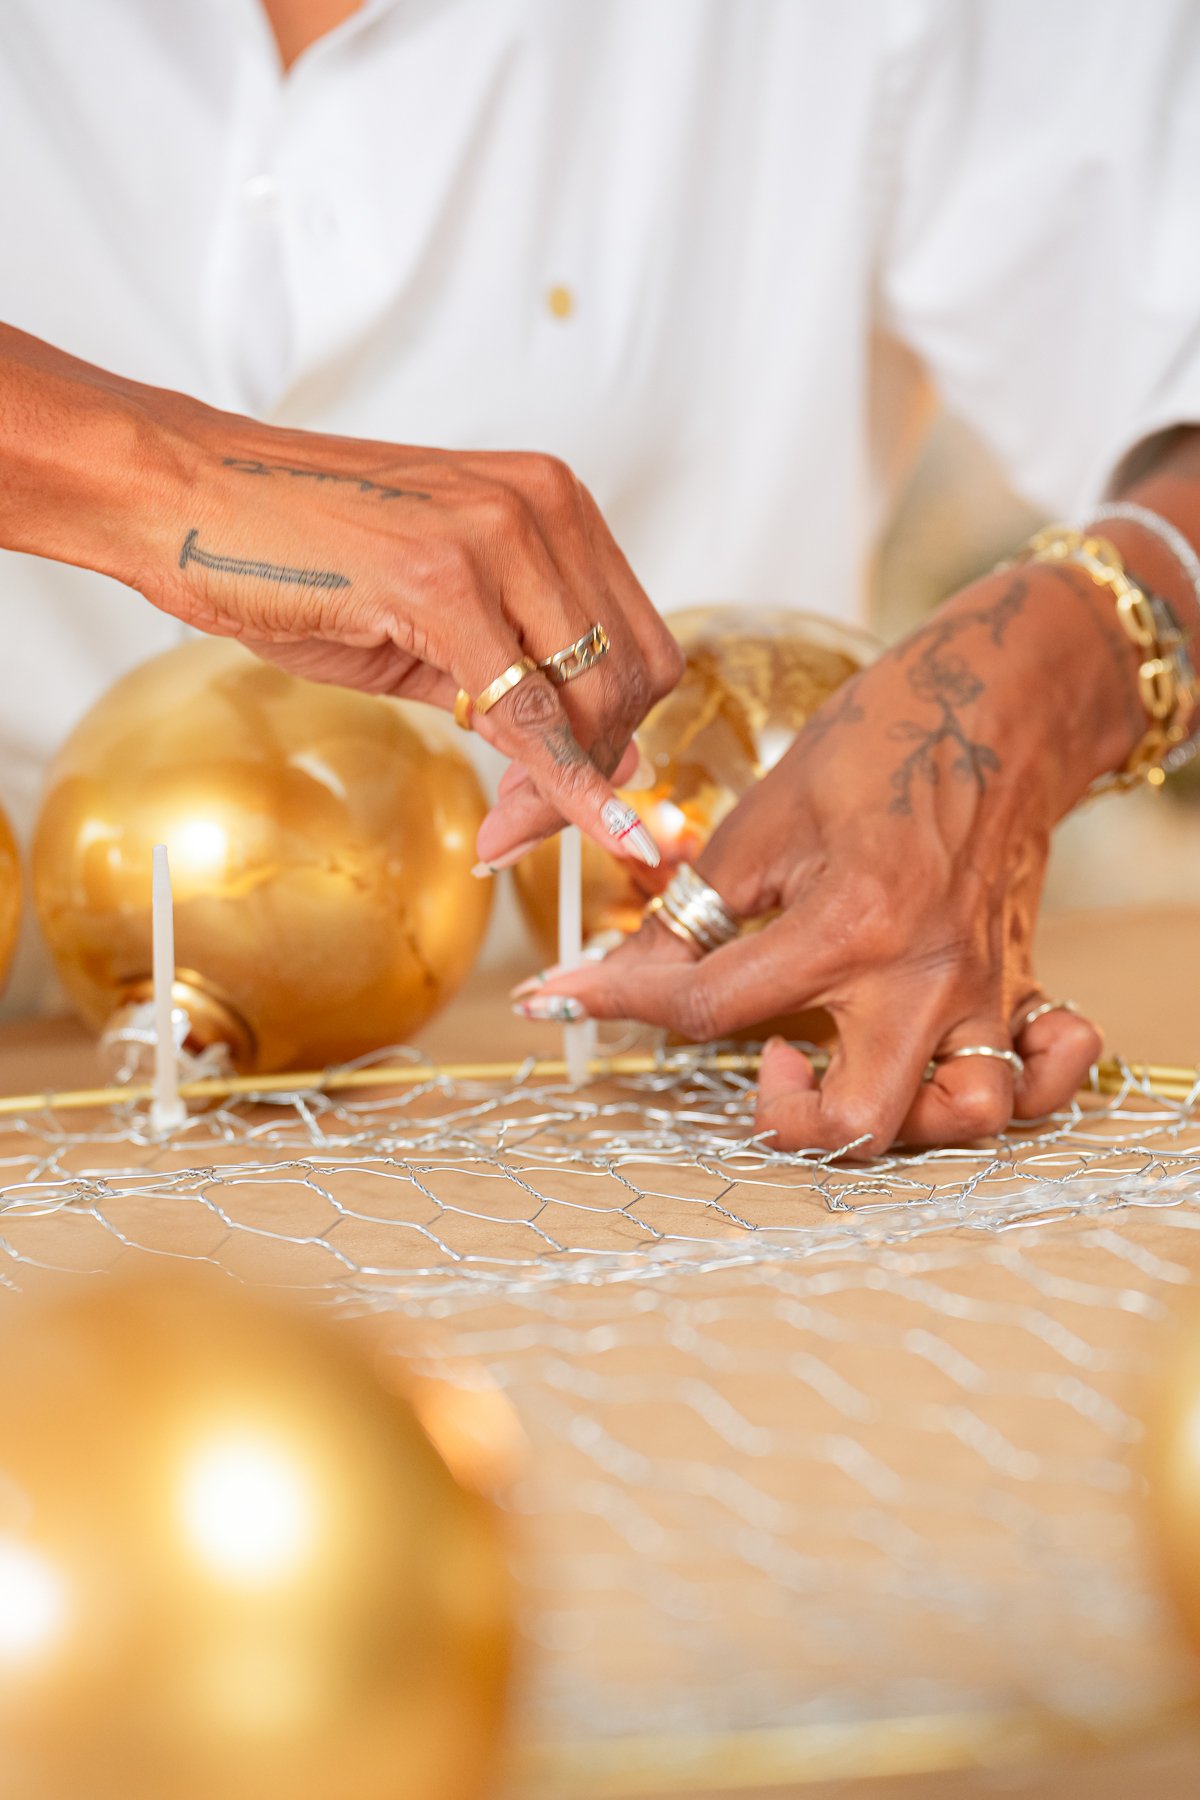
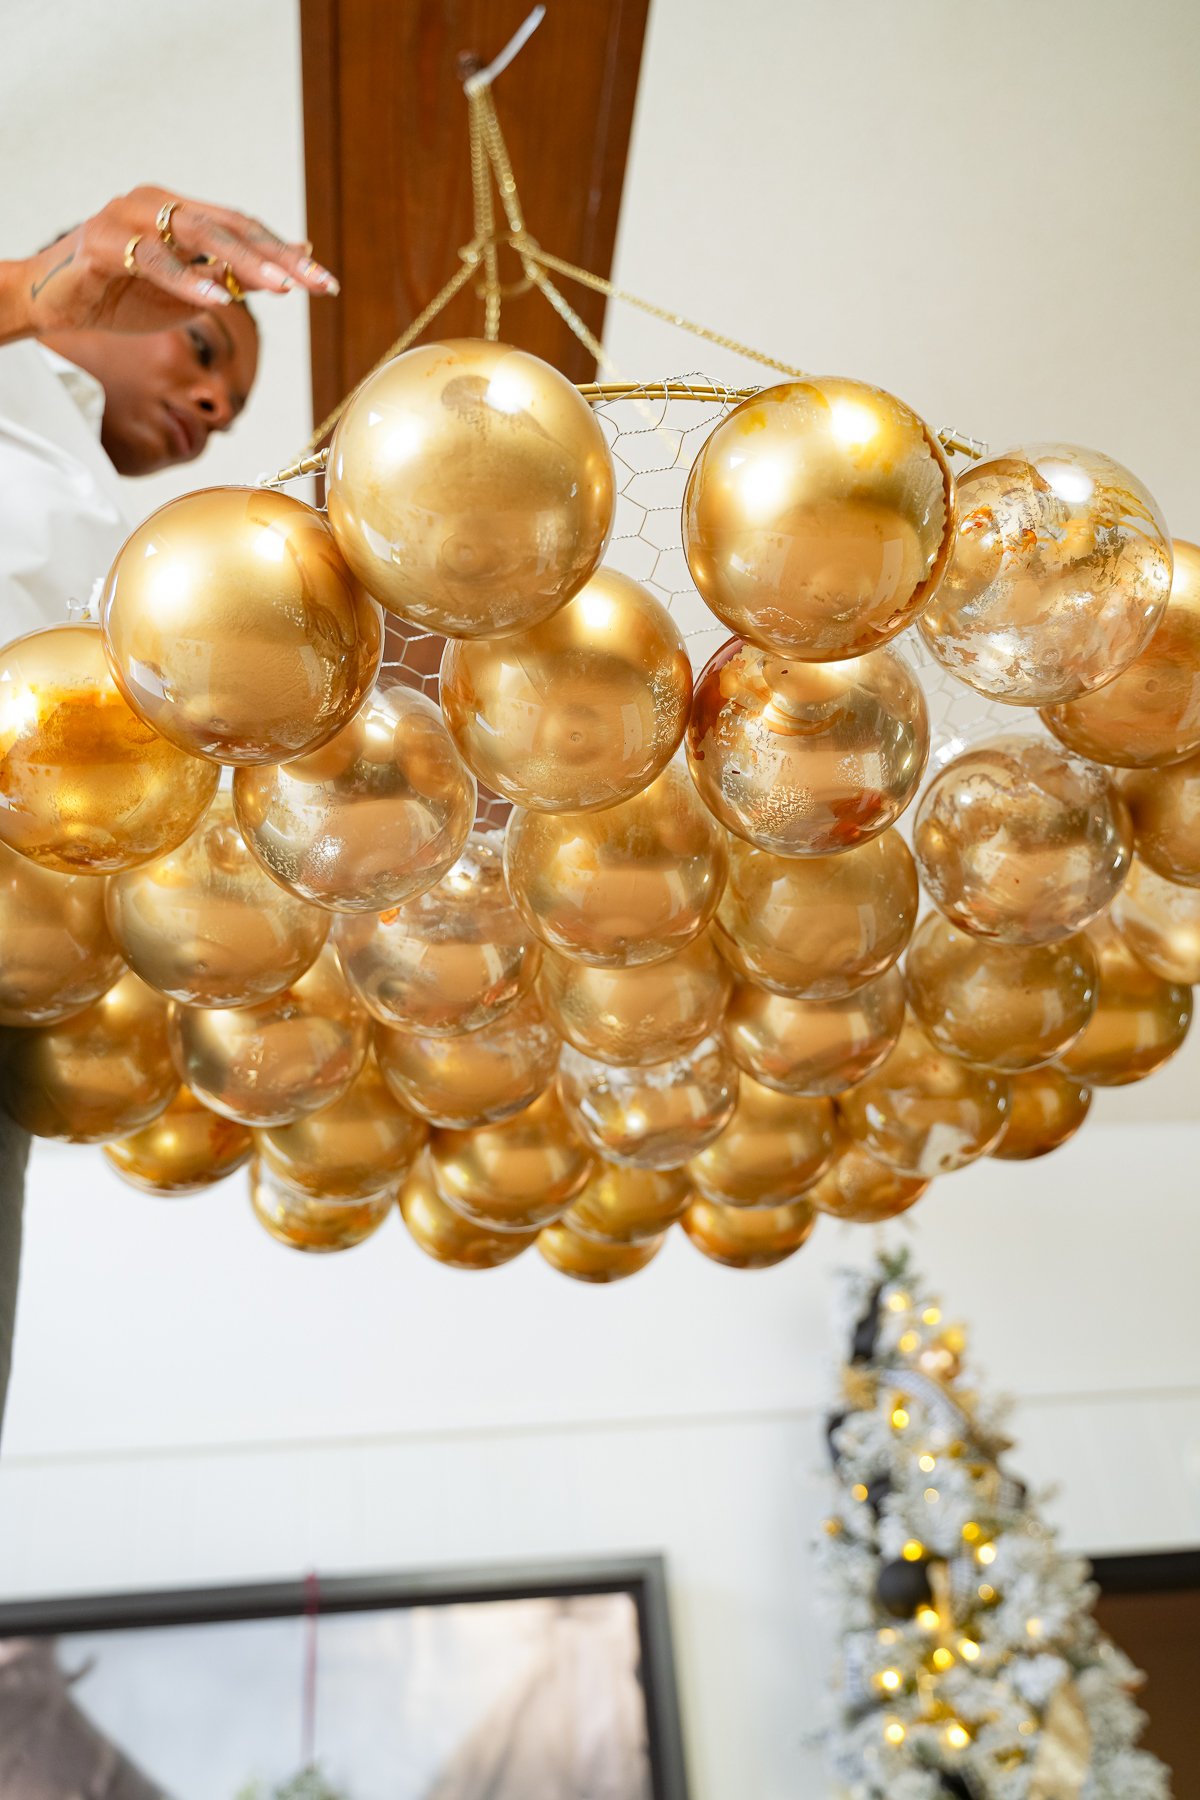
Embroidery ring or floral ring
Chain to hang the light fixture


Remove the tops of the ornaments and squirt the ink dye into the ornament. Shake the ornament to distribute, and then let it dry for 30 minutes to an hour.
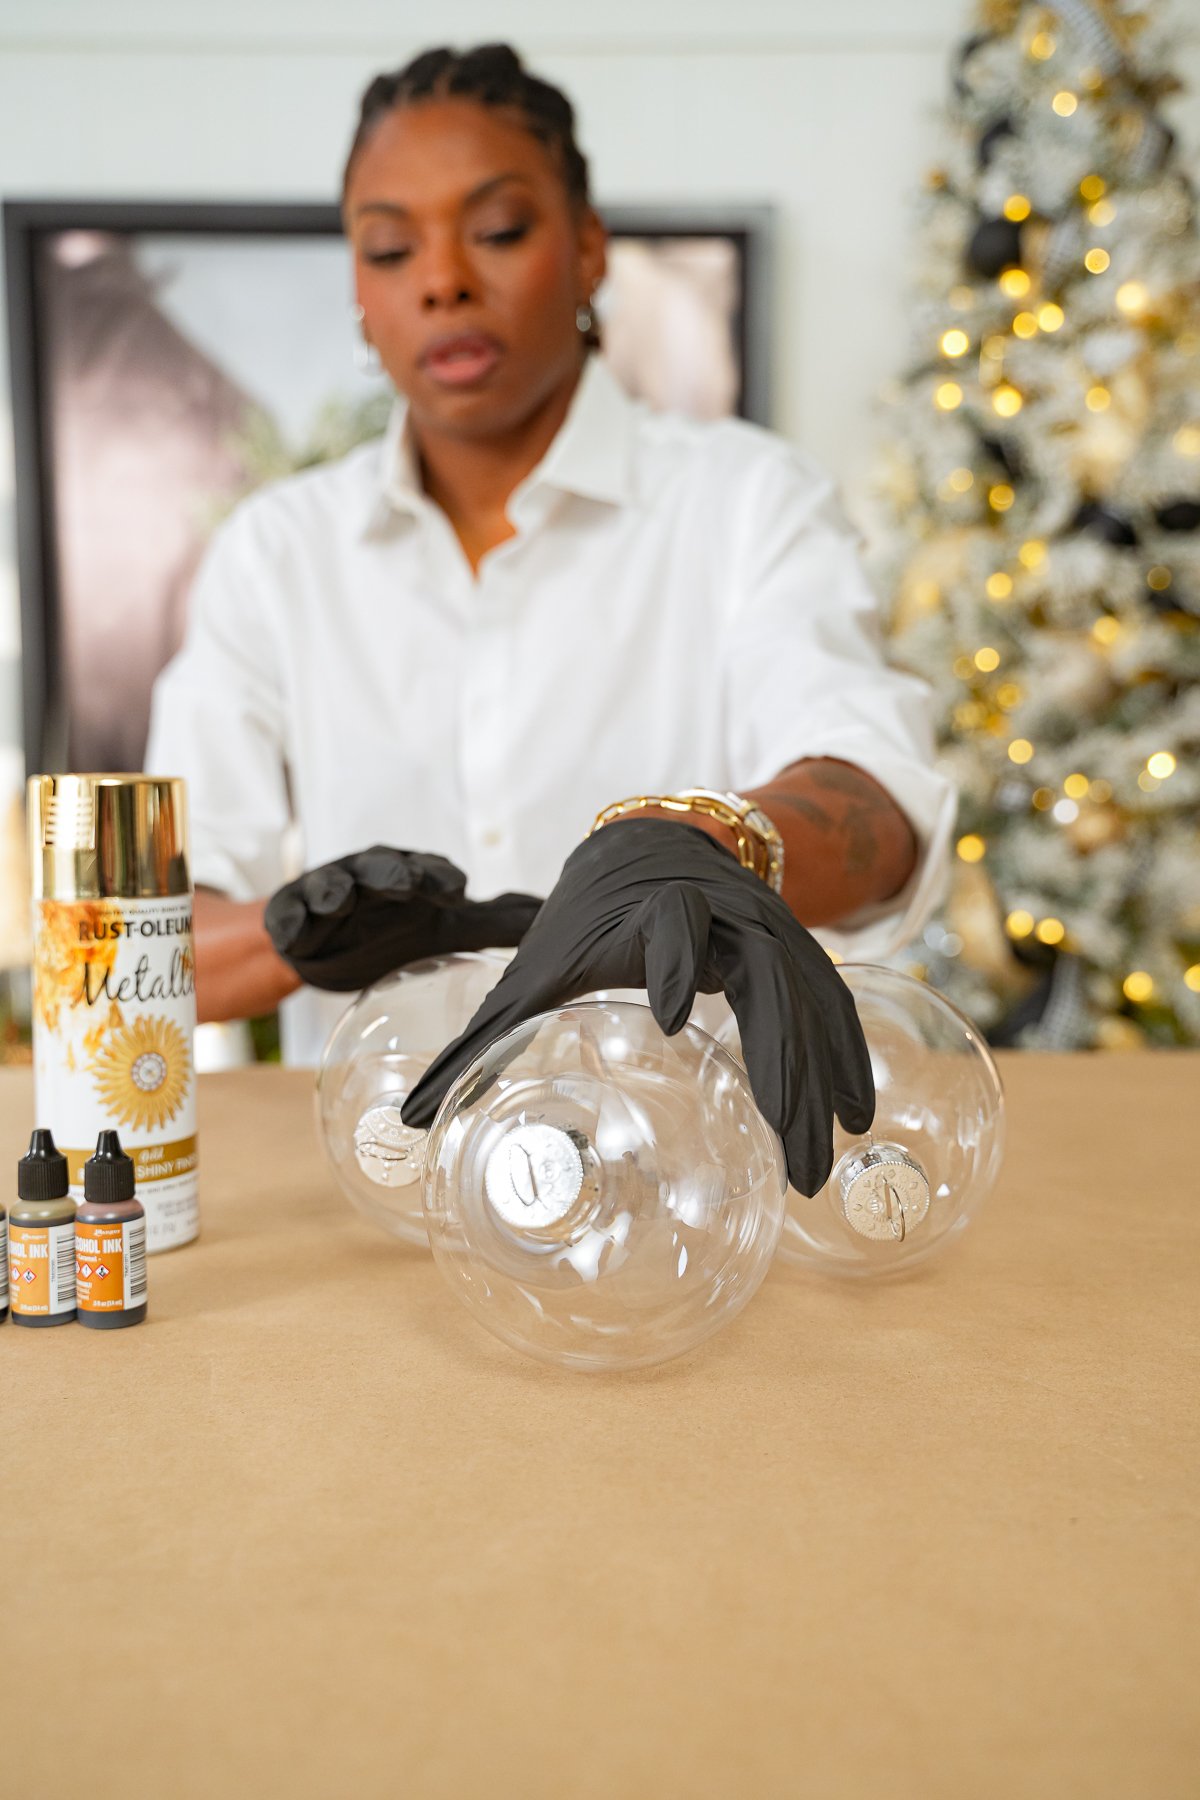


Next, take your spray paint and lightly coat the inside of the ornament. Shake, and let the ornament dry for 30 minutes to an hour.


Use a floral or embroidery ring for the base of your light fixture. Adjust the size to your liking.

Cover the ring with chicken wire.


Recover the ornaments with the tops.


Use zip ties to attach the ornaments to the structure.


Once all of the ornaments are affixed, use a chain to hang to your desired height.


Once adjusted, take your remote-controlled lights and attach them to the top of the light fixture .


That’s it!
